Another guest post from my buddy David Jeffries! Y’all know I love my Rogue pull-up bar, but David made his own and used it a long time! See if this might fit your set up well. BRING IT!
———————————————–
Fixed pull up bar! So you’ve decided to go big time and have a dedicated area for your fitness endeavors? AWESOME! Don’t get me wrong… one of the truly great things about P90X, Insanity, Body Beast, and other Beachbody programs is that you can do them in your living room. They are perfect for saving space and using limited equipment. As you progress, the pros to having a dedicated space start to outweigh the cons. IMHO, one of the great pieces of equipment you can get is a fixed pull up bar. There are great options from Rogue and Stud Bar if you want to buy one, but here is what I did before having a pull up bar on my squat rack.
THE DIY FIXED PULL-UP BAR
When I wanted to get a fixed pull up bar, I decided to make my own. You can find a lot of information of there on different methods and types. First let me show you a great option if you have exposed joists.
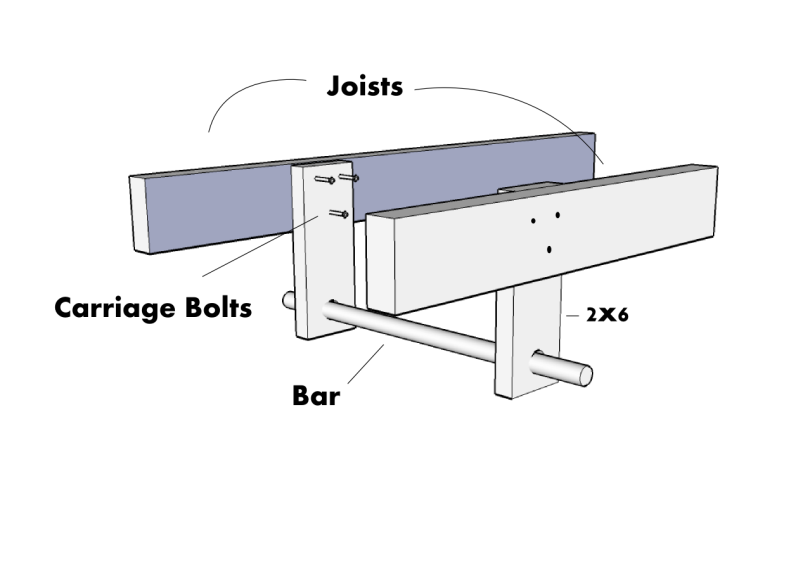
The 2×6 Method
- 2×6 (1 – 8′ will do)
- 1 – 4′ piece of black pipe (1 1/4″ diameter)
- 2 – 1 1/4″ end caps
- 6 carriage bolts, washers, and nuts
Using 2×6 material for the vertical members of the bar, you drill a matching (TIGHT to outside diameter of your pipe) size hole in two identical length 2x6s. You will need to size those pieces for who tall you are and the height of your ceiling. Clamp the pieces to opposing joists, a little less than 4′ apart. Pre-drill for the bolts and hang with carriage bolts. Pound your pipe through and cap the ends. EASY!
The All Pipe Method
- 2 – 4-6″ pipes of black pipe – 1″ dia
- 2 – 1″ to 1 1/4″ pipe 90 degree elbows
- 2 – 1″ flanges
- 1 – 4′ black pipe 1 1/4″ dia
- 8 lags bolts
- scrap 2×6 or 2×4
My method for my fixed pull-up bar was all pipe. Again you need access to you joists, but then it is straight forward. Screw together all your pieces of pipe (so it looks like a pull up bar). < Great directions huh? :) If you noticed, I used 1 1/4″ for my actual bar and 1″ for my risers. That allowed me to use smaller flanges. Make sure that all your fittings work together, and make sure to keep them TIGHT. Otherwise, it can be creaky. Normal floor joist spacing is 16″ on center. So a 48″ span is perfect. The flanges are wider than the bar, so I used scrap 2×6 to sandwich the joists. This gave me the area to fill all four holes on the flange with a bolt. Let’s take a look at the pictures.
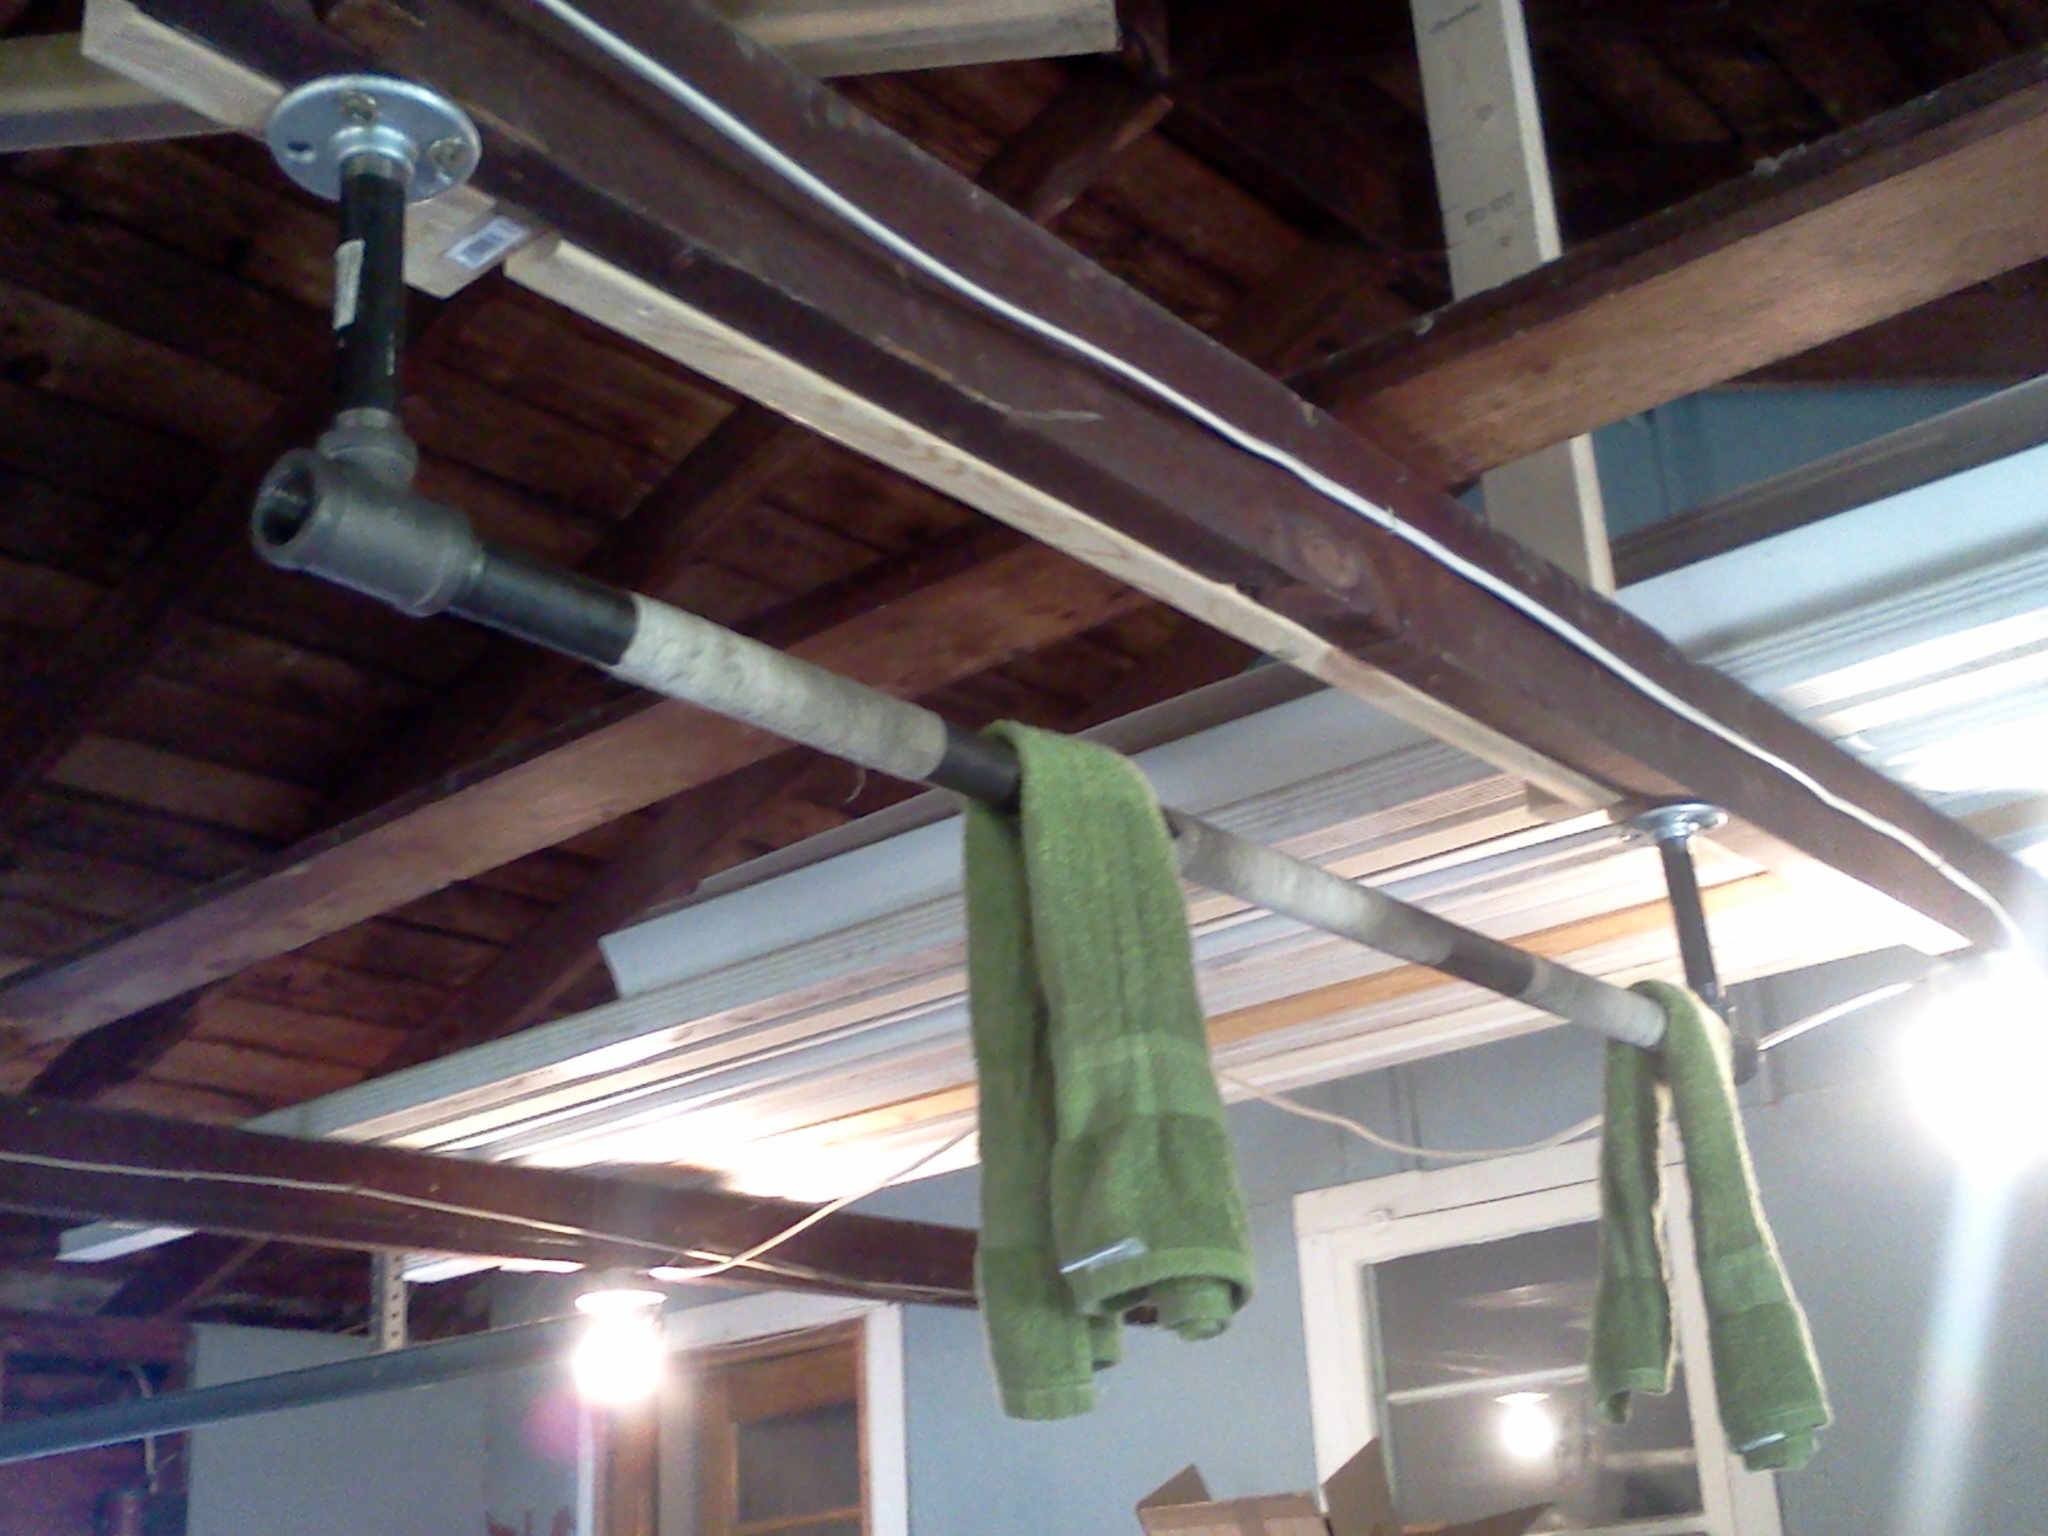
I had to buy “T” connections, as they were out of elbows… notice the scrap used to give more area to screw into. Each lag bolt has an individual pull out strength of 750 lbs… so x8… hmmmm 6000 lbs should be good!
Taped for added comfort!
All said and done, I think I spent $32 at Menard’s. I took maybe 30 minutes to get up and rolling. Levers and kipping pull ups are great on a fixed bar. No wobble and oh so solid! If you have the space, make one at home. I doubt you will ever go back to the doorway.

Spaced in the basement on the floor joists.
Need a coach?

My email: coachwayne@teamripped.com
IG: @wayne_wyatt


